Create a new case request
Watch this demonstration of how to create a new case request within the Supreme Court of Victoria's electronic filing system RedCrest.
This video will show you how to create a new case request in the Supreme Court’s electronic filing system, RedCrest.
Please note that the selections made are examples only. If you require any assistance on procedural matters, please contact the relevant registry.
From the eFile screen, select the create new case request button.
On this screen we will enter the proceeding information, party details and attach the documents which are being filed.
In the top section select the case type you’re filing.
Then select your initiating action. If you are unsure about either of these steps, please contact the relevant registry for assistance before continuing. In the party section, enter the party details. Select the party type. Select the legal representative checkbox if you are representing this party.
Then select the on behalf of checkbox.
Select the fee category for the party. If you're representing multiple parties, select on behalf of and the fee category for the highest fee payer only. More information on fee categories is available on the Supreme Court website.
Next, enter the name of the party, either first name, last name, or company name.
If you are representing the party, then the contact information is the contact information for your law firm.
For the email address, please enter the email address as it appears in the tram tracks of your document. In the party 2 section, add the second party.
Please note, do not enter the email address for any defendants or respondents.
To add additional parties, click add party and follow the previous steps.
Once you've added all parties, select the document type you are filing.
Attach the document by selecting the browse button, and title it using the document notes section in line with the document naming conventions.
The document naming conventions can be found under the resources section by clicking on the sidebar on the screen.
You'll then need to attach your completed application for fee category form if it is required for the fee category selected.
Please note it is not required for corporate or natural person fee categories. The application form can also be found on the sidebar under fees and application forms.
You can upload your attachment by clicking on the browse button, and enter the document title.
Continue to add any additional documents you need to file by selecting add document.
Please ensure your documents are fully completed, including with hearing details where required before uploading.
On this screen you can also add a filing note which will be viewable by the registry.
Please note if the filing is urgent or required in Court for the following day, please contact the relevant registry immediately after filing.
Once you have attached all your documents for filing, select continue with filing. This will take you to the review screen.
At this stage, your filing has been saved as a draft. Please note the new case request number or eFile ID at the top of the screen.
Once you submit your filing, you can quote the eFile ID if you need to contact registry to query your filing.
If you need to modify your filing, select the modify button at the bottom of the screen. This will take you back to the previous screen to make any edits required.
Otherwise, you can continue by selecting add to cart, and then submit filings and pay now. You'll be directed to PayPal to enter your payment details.
You can use either a PayPal account or pay directly with a credit or debit card. If using a credit card, then the information entered here must be exactly as it appears on the credit card.
Select pay now. Please note that this is an authorisation to deduct funds when your filing is accepted. Payment will be not deducted if your filing is not accepted.
Once your payment has been completed, your filing will be submitted with the Court to review. For further information on how to file, please see the eFiling user guide and FAQ sheet available on the RedCrest home page.
On this page:
- Create a new case request
- Add parties
- Fee payer
- Add documents
- Finalising new case requests
- Paying for filings
Step-by-step guide - Create a new request
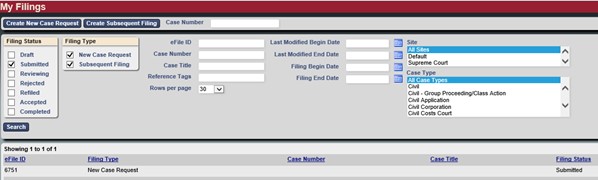
1. Click eFile to access My Filings page.

2. Click Create a New Case Request.

All fields in the 'New Case Request' screens displayed with an asterisk * are mandatory and must be filled in.
You will need to enter the following details to start the process to create a new case request.
- Case Type: Select the Division of the proceeding and/or List descriptor e.g. Common Law (General), Commercial Court (Judge managed) or Criminal Application etc.
- Initiating Action: Select the case claim. For example, Corporations – Bankruptcy & Insolvency.
- Leave ‘Law Firm Bar Roll Number’ and ‘Reference Tags’ blank.
Add Parties – Party 1
The New Case Request screen displays data fields for two parties. These instructions apply to both Party 1 and Party 2 and any additional parties you may need to add.
All party names should be entered using upper and lower case letters, rather than all capital letters.
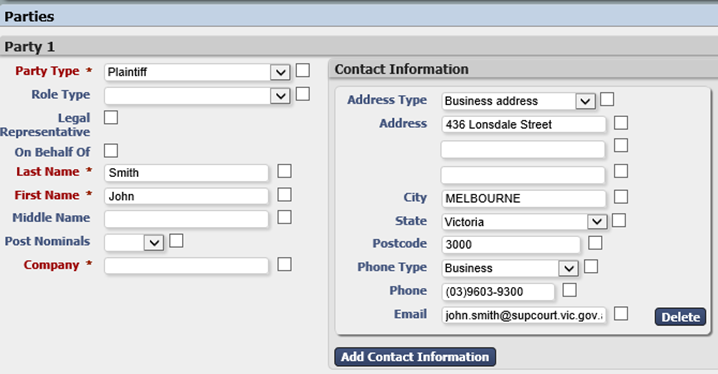
In the Party 1 section, enter the following details.
Repeat this process for party 2 and any additional parties.
- Party Type: Select the Party Type e.g. Plaintiff, Defendant, etc. Please note that “Corporation” as a party type should only be used for Corporations List proceedings.
- On Behalf Of : Tick this box to select your Fee Payer Category. This is further described in section 5.2, below.
Use either Last/First Name or Company fields (you are not required to fill in both).
- Last/First Name: Type the last name, first name and middle name (optional) of the Party as it appears on the originating document. If the party sues or is being sued in a representative capacity (e.g. as executor, litigation guardian, liquidator etc.) enter into the Company field.
- Company: Type the name of the Company as it appears on the originating document. If the party sues or is being sued in a representative capacity (e.g. as executor, litigation guardian, liquidator etc.) enter into the Company field.
- Email: Enter the email of the Case Manager. The Case Manager is the practitioner or party responsible for the conduct of the proceeding whose details appear in the ‘tram tracks’ on the document being submitted for filing.
For Judge managed proceedings in the Commercial Court only, Notifications of Electronic Filing for your party in this particular proceeding will be sent to this email address. Notifications of Electronic Filing will not be sent in other proceedings.
The other fields do not need to be completed.
Party 2 and additional parties
To add another party click 'Add Party' and follow the steps outlined in the above 'Add parties - Party 1' guide.
Do not enter the email address for any defendant/s or respondent/s.
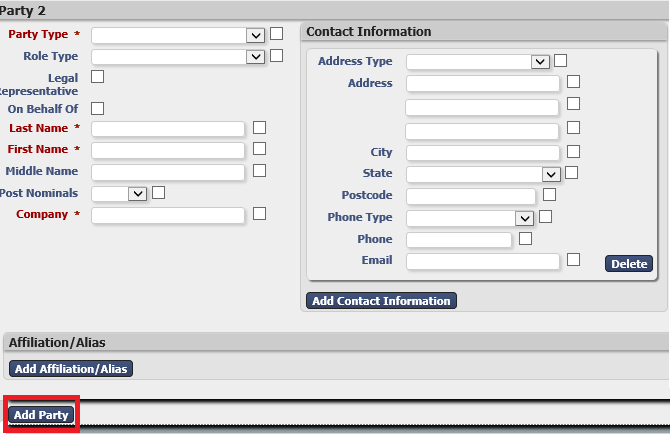
In a proceeding initiated within the Corporations List Case Types, three parties will be required before you can continue with your filing, being the Plaintiff, Defendant and the Corporation.
The Corporation is the party that is the subject of the Corporations List proceeding.
Select Fee Payer Category
1. Select the On Behalf Of check box next to the party you are filing on behalf of.
If filing on behalf of multiple parties, select On Behalf Of the highest fee paying party (you cannot select more than one Party). The Fee Category selection displays.
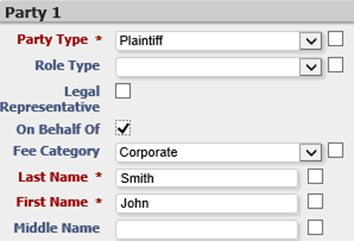
The Fee Category will automatically default to ‘Corporate’ – all fees will be charged at a Corporate rate, unless this category is changed.
2. To change the fee category, use the Fee Category drop down box.
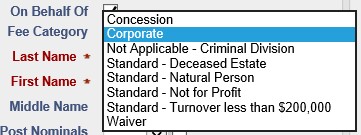
Proceedings in the Criminal Trial Division or in the Criminal Division of the or Court of Appeal shall select Not Applicable – Exemption.
Further information on Fee Payer Categories and fees can be found in the Fees, Forms and Services section.
Add Documents
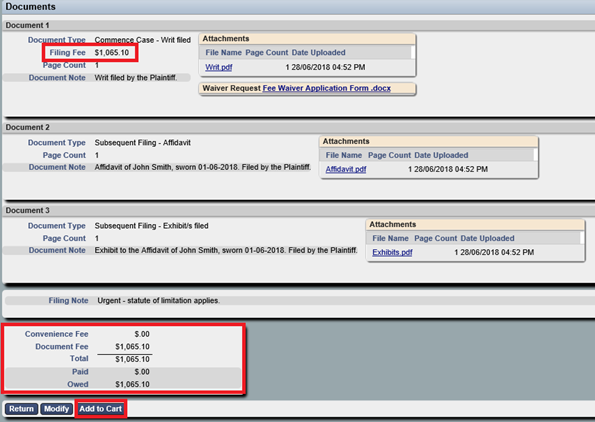
1. Under Documents, in the Document 1 section enter the following:
- Document Type - Select the document type e.g. Commence Case - … or Subsequent Filing - …
- Filing Fee - This fee will automatically generate, depending on the Document Type and needs to be paid via PayPal when the Filing is submitted. See Paying for Filings
- Document Note - Enter the title of the document (in line with the Annexure B, at the rear of this guide). E.g. ‘Writ filed by the Plaintiff.’
Fees can also differ based on Fee Category selection and Case Type selection (that is, the Division of the Court).
2. To upload your PDF file, under Attachments, click Browse. The Choose File to Upload window displays.
If the file is too large, a message will display File is too large to attach. Large documents can be broken up into 3 x 24 Mb document attachments. There is a maximum of three files per Document Type.
3. Navigate to the required PDF document and double-click to attach.
4. To view the document you attached, click on the File Name link. Double-check the document before you click Continue with Filing.
5. To add more documents, click Add Document. Repeat steps 1 to 4, above.
‘Document 2 - Supreme Court Application for Court Fees’ will automatically display upon selecting the fee categories.
(a) Concession;
(b) Standard - Deceased Estate;
(c) Standard - Not for profit;
(d) Standard - Less than $200,000; or
(e) Waiver.
If applying for a Concession payment or one of the Standard categories listed above, upload a completed Application for Standard or Concession Court fees.
If applying for a Waiver, upload a completed Application for Waiver of Court fees.
To upload and attach the form, follow steps 2 to 4 under 5.3 Add Documents.
Further information on Fee Payer Categories and fees may be found at Forms, Fees and Services.
To remove an attached document, click Delete to the right of the document name.
In the Filing Note field, you may wish to enter the following:
- If the case is urgent (please ensure you have contacted the relevant Registry by telephone), see Urgent Documents;
- Any related cases; or
- Any additional information.

1. Check all the entered information is correct.
2. Check the Added Documents are complete and correct.
3. Check the Filing Fee is correct. The Filing Fee is displayed in the cost section.
4. Click Continue with Filing.
- This saves the data entered and displays a summary page with the New Case Request eFile ID.
- Quote this number when contacting the relevant Registry to discuss any queries relating to your filing requests.
Or, alternatively, click one of the following:
- Cancel: Returns you to the My Filings work queue and cancels any additions or changes made to the New Case or Subsequent Filing request. Information entered on your screen will NOT be saved if you select this option.
- Save: Saves any additions or changes made to the New Case or Subsequent Filing request. Your filing will be saved as a Draft and will be viewable on the My Filings page.
Where there is no prescribed fee for the filing of a document you should follow this process (otherwise proceed directly to section 5.8 – Paying for Filings):
1. Check all of the information you entered is correct and click Submit Filing. Your My Filings page will display with the New Case Request listed awaiting approval.
•Or, alternatively, click one of the following:
Return: Returns to My Filings queue (this saves the efile ID as a draft. To delete go the My Filing page, tick the tick box and click delete).
Modify: Make changes or modifications to your filing.
Paying for Filings
When the Document Type requires payment, the filing fee will display both underneath the Document Type and in the Total at the bottom of the screen.
1. Click Add to Cart.
The Filing Cart window displays.
2. Click Submit Filings and Pay Now.
You will be redirected to a PayPal payment screen.
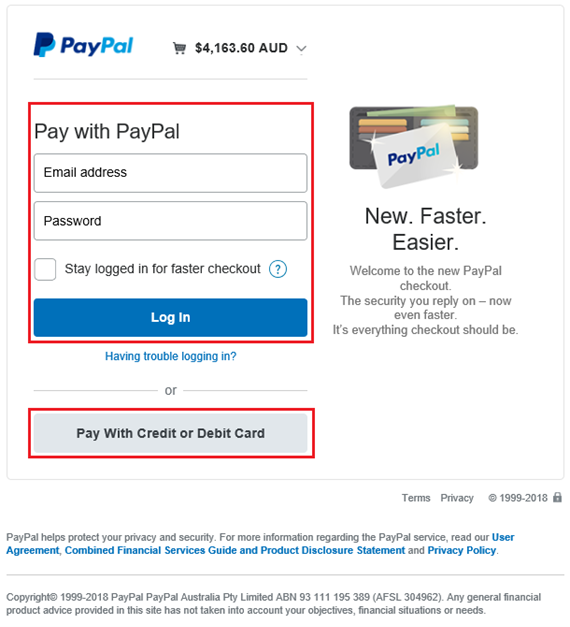
3. From this screen you have two options:
- Log into PayPal and pay using your (or your organisation’s) PayPal account.
- Pay with a credit card or a debit card.
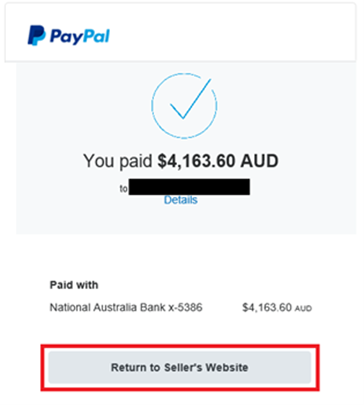
Keep a copy of the PayPal receipt for your records.
5. From the payment summary page, click Return to Seller’s Website. The RedCrest Payment Confirmation window displays (see example) .
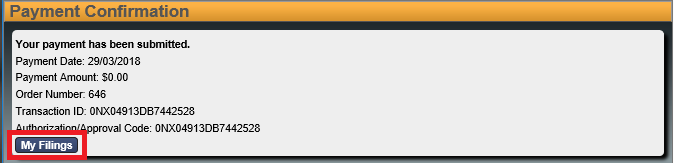
6. Click My Filings. The filed document displays in your My Filings Queue with status Submitted.
Your payment will be Pending (the pending payment is only an authorisation) until the Court accepts your Filing(s) and will then complete your payment with PayPal.
You will receive an email confirming that your document has been submitted for filing.
Failed Payment
If your payment fails to process, check the card limit/restrictions or contact your merchant.
If your payment has been processed and the document has been accepted by the court but you haven’t received a receipt from the Court, please contact the relevant Registry.